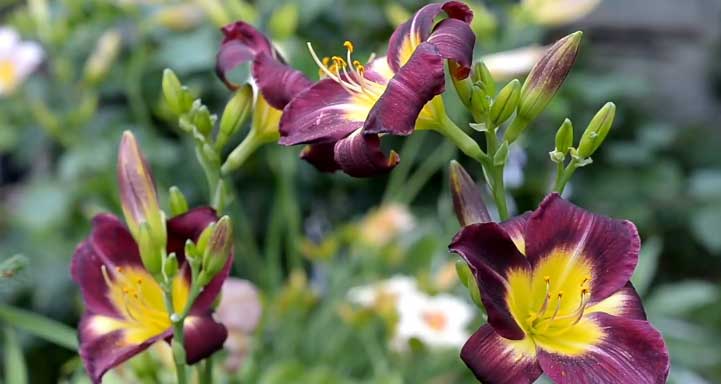
Daylilies can adapt to new situations quickly. Though these plants are easy to grow, you need to plant them and take care of them accurately, no matter whether you plant them in the ground or in a container.
So if you want to plant daylilies in containers, then your concerns might be how to plant daylilies in a container, when to plant daylilies, etc.
However, unlike other plants, you need to be cautious while choosing the container as drainage and hydration are two big factors for daylilies.
In the following discussion, we’ll discuss how you can successfully plant daylilies through a step-by-step guide. So read along to learn more.
Can You Grow Daylilies In Containers?
Yes, you can grow daylilies in containers as long as the container is suitable for daylilies to grow freely. There are different sized containers available for planting daylilies, but the smaller the container is, the better daylilies will thrive.
However, remember that if you choose to plant full-sized daylilies, you shouldn’t go for containers shorter than a gallon.
How To Choose The Perfect Container For Your Daylilies?
Having the right sized container for growing daylilies is an essential part of planting daylilies. If the container you choose doesn’t offer enough space for daylilies to spread roots, daylilies will invest all their energy in surviving; consequently, plants will bloom fewer flowers.
Generally, daylilies grow 30 to 35cm tall. In that case, you should choose a container around 40cm in diameter. On the other hand, if you choose daylily varieties that grow taller above 50cm, then you should look for a container about 60cm in diameter.
Besides the depth of specific diameter, the container needs to have an adequate drainage system. However, you can also skip this part and make holes in the container using a drill according to your preference.
When Is The Right Time For Planting Daylilies?
If you belong to an agricultural region in the United States, you can plant daylilies anytime you want. Generally, frost-free zones are the best places to plant daylilies year-round.
However, daylilies prefer to grow best during fall and spring. During this time, these plants get enough time to build their best rooting systems before blooming beautiful flowers.
But if you’re living in a cold region, then consider planting daylilies after the very last frost in spring. You can also choose to plant daylilies in containers about four weeks before the very first frost during the fall.
Types Of Daylilies
There are different species of daylilies, and few of them prefer to grow best during the early season, and few prefer to grow best during the midseason. Here are most favorite types of daylilies according to the gardeners:
Early Season Daylilies
- Hemerocallis’ Bright Sunset’
- Hemerocallis’ Little Grapette’
- Hemerocallis’ Happy Return’
- Hemerocallis’ Ruby Spider
Mid Seasonal Daylilies
- Hemerocallis ‘Bela Lugosi’
- Hemerocallis’ Cherry Cheeks’
- Hemerocallis’ American Chief’
- Hemerocallis’ Charles Johnston’
- Hemerocallis’ Catherine Woodbury’
- Hemerocallis’ Janies Brown’
- Hemerocallis ‘Stella De Oro’
- Hemerocallis’ Strawberry Candy’
- Hemerocallis’ Red Volunteer’
- Hemerocallis’ Joan Senior’
How To Plant Daylilies In A Container: Step-by-Step Process
Alright, now you know how large a container you need when you should plant daylilies and which daylilies are best for early and midseason. So it’s time to learn how to plant daylilies in a container.
● Step-1: Choose the Right Soil
The best part about planting daylilies is these plants can grow in multiple soil conditions. But if you want the best result for daylilies, you’ll need to choose the right soil before planting them in a container.
Generally, daylilies prefer moist, well-drained, and enriched organic matter soil. That’s why loose, loamy soil is mostly recommended by experienced daylily gardeners.
If you choose sand, clay, or gravel, then you will need to add compost like rotted leaves, manure, or other organic matters to improve the soil.
Next, you need to ensure the pH level. Daylilies are fond of a bit of acidic soil between 6.0 and 6.5. Use a soil pH tester to test the level.
- If the soil has a higher pH level than the needed level, use aluminum sulfate and sulfur to reduce the pH level.
- And if the soil pH level is low, then consider adding limestone to increase and adjust the pH level.
● Step-2: Prepare drainage
Now you need to prepare the drainage. Daylilies like moist soil, not wet soil. Therefore, you need to ensure that water can drain out pretty efficiently after watering the plants. If the soil remains soggy for a longer time, the roots of the daylily plants can rot easily.
If your store-bought container doesn’t have any holes in the bottom, make holes by yourself using a drill or something sharp.
However, you can also apply a trick to ensure better drainage. You can line the container’s bottom using a porous or shade fabric before pouring soil into the container. This way, you can ensure that holes don’t get clogged by soil.
● Step-3: Add Soil to the Container
Select a potting soil for planting your daylilies in a container. Now pour potting soil into the container’s bottom, don’t fill the container with soil mix only. Now pour normal ground soul, then pour potting soil again on top.
The rootball of the daylily plants will sit below about an inch from the container’s top rim.
● Step-4: Add soil amendments
What if you don’t want to use potting soil? Or is the potting soil you have used isn’t powerful enough to improve your existing soil in the container? Then you can add amendments.
Soil amendments refer to the process of adding additional matter to the soil in order to make the soil more suitable for plants. These additional matters will aerate the soil, reduce compaction, and make nutrients more accessible to roots.
By adding soil amendment in the container, you can create a better environment for daylily’s roots.
● Step-5: Dig a Hole for the Daylilies Roots
Now that you have set the soil layers, dig a hole in the middle of the container to place the daylilies’ roots. Use a mattock for this step, and make sure you don’t mix up the soil layers while digging.
● Step-6: Plant the Daylilies
It’s the time when you finally plant your favorite daylily in the container. Place the roots in the hole and put back the soil again over the roots. Don’t press the soil too much and make the soil hard. Use your finger to gently press the soil so that the plants don’t fall down.
● Step-7: Water and Fertilize
The only step left is maintenance. You should keep the daylilies hydrated by maintaining their moisture tolerance. If you plant seeds, then you need to soak the soil and let the water drain daily for the first 7-8 weeks.
Then you need to get into a watering routine. During the winter season, you should water daylilies when a few inches on top of the soil is dry. In contrast, you may need to water daylilies daily during the summer or drought.
In short, how cold or warm the temperature determines how often you should water your plants.
Besides, to make your daylily plants grow and healthy in a container, you need to feed them daylily care fertilizer. You should feed plants during midsummer, fall, and spring. And during the rest of the time, amend the soil with compost. Consider choosing a fertilizer with an N-P-K (Nitrogen-Phosphorus-Potassium) ratio of 3-1-2.
Note: The process of planting daylilies in the ground is different from planting them in a container. That’s why you need to know how to plant daylilies in the ground separately.
FAQs
How many daylilies can you plant together in a container?
Generally, daylily plants should be planted about 18” apart from each plant on the ground. So you can’t plant more than one daylily plant in a container unless it’s a very ample container to maintain at least a 15” gap between each plant.
How can I keep my daylilies blooming throughout the summer?
The best way to keep daylilies blooming throughout the summer is deadheading. It’s the process of removing spent flowers before they turn into seeds. Take your time and deadhead the flowers correctly to ensure the constant blooming of daylilies.
Should you remove dead leaves from daylilies?
Yes, you should prune the daylilies in order to get rid of yellow or dead leaves in summer. Another benefit of cutting the entire plant is that it’ll grow back and will produce more beautiful flowers.
Conclusion
In the above discussion, we discussed how to plant daylilies in a container, along with the information on when is the best time to plant and how to choose a container for planting daylilies.
When planting daylilies, you must pay some extra attention to making the drainage system, and watering routine as daylilies can rot due to excessive moisture.
However, if you have a greenhouse, then you can plant daylilies whenever you want. Once the daylilies spread their roots, afterwards, plant the rooted daylilies in the container with potting soil and amendments.