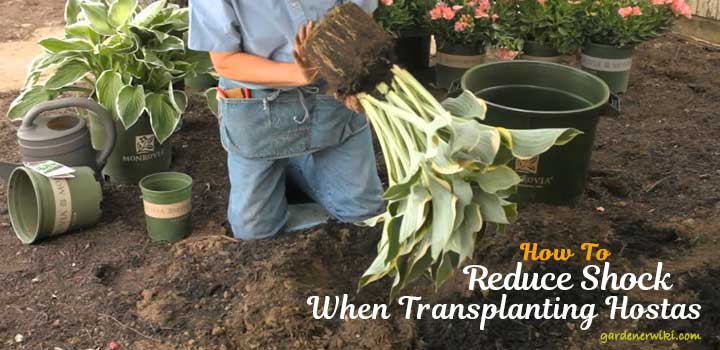
Those who have Hostas know the struggle of dealing with damaged Hostas. This plant is prone to shock, especially during transplantation.
Since Hostas are delicate-natured plants, they tend to get shocks from time to time if their roots get damaged in any way. It can be troublesome to preserve your beloved plant in such a case.
And sometimes you’ll be wondering why Hostas are turning yellow and brown since it can be a side effect of transplanting.
However, such a case can always be prevented. Therefore, to help you out on this journey, we’ve covered all the topics on how to reduce a shock when transplanting Hostas.
By reading this article, not only will you learn the process of how you can reduce the shock but also get to know more tips and tricks on how you can manage them better. So, without further ado, let’s jump in.
Should You Transplant a Hostas?
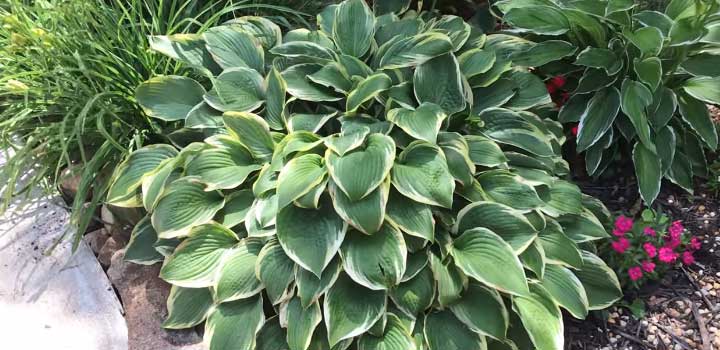
Hostas are shade-loving plants and are usually popular for their attractive leaves. While they’re widely used as a plantation option for their attractive features, it tends to be a pretty tough plant.
However, when it’s exposed to stressful events like transplanting, they react in a rather unfriendly way– something you wouldn’t like your plant to do.
But, don’t worry! Your hosta plant isn’t going to bite you. However, it can get tiresome to deal with Hostas from time to time. One of the best reasons you should transplant a Hostas is its attractive living quality. In most cases, by transplanting Hostas, you’re saving its life. Not just that, it serves a great purpose to your decor too!
Not to mention, transplanting Hostas from your garden with runny water to a new home is always a sensible move to play. Usually, dogs and cats playing around the garden make the environment for the Hostas a bit harsh. Thus, it’s recommended if you transplant your Hostas to a new place.
When to Transplant Hostas?
Wishing to transplant Hostas can sound like a great idea. But, it’ll quickly drown your hopes if you try to transplant them in the wrong weather, and if you don’t have the fertilizer for hostas. Every plant has a reserved cycle and blooming weather – so do Hostas.
Hence, to acquire maximum results, it’s always better to grow them under the weather they can grow best. Some of the times are –
- Spring
Without a doubt, spring is the most favorable weather for the Hostas. This time is the best time of the year to get maximum results.
One of the reasons why spring is a great choice is because it’s a lot easier on the gardener too. Not to mention, spring is a weather literally suited by mother nature herself for all the placentations of the world.
Plus, in spring, plants get plenty of water from their roots, which makes it perfect for the spring to adhere to its transplantations.
- Summer
Summer is usually the season of warmth and humidity. In such an environment, Hostas don’t grow so well.
However, in late summer, the ground moisture of the soil strengthens and helps in the transplantation process. It’s a big reminder to keep in mind that hosts are prone to hard soil and dry air.
Hence, during summer, if the air is too dry and the soil is rock solid hard, it’s not a good time for the Hosta’s growth.
- Fall
Another great season to transplant Hostas is the late fall. Time and year matter highly when it comes down to transplanting Hostas.
Just like spring, the late fall is a great season for transplanting Hostas. Around September, the air and soil temperature remains quite warm at this time of the year.
If transplanted at this time, the Hostas almost complete their active growth by late September. Leaves are seen to fall here and there, yet it won’t be unseen how beautiful Hostas can be.
Another reason why autumn can be great weather to transplant is the Hosta’s capability of regeneration. During autumn, Hostas can continue to grow their roots even if they’re destroyed for any reason. you can check how to get rid of Hosta properly without any damage.
- Winter
In winter, the temperature is cool with quite breezy air. Generally, Hostas are prone to cold temperatures. However, they do not die in winter. They have the ability to regenerate even if they get frostbite or frozen foliage.
How to Transplant Hostas
It can seem like a daunting job, but in reality, it isn’t. The whole process is effortless and easy to pull off if you follow correctly. However, you should keep in mind that Hostas is a sensitive plant. And if there’s a lack in the root system, that’s when the Hostas get stunt or shocked.
To avoid the shock, there are some steps you can take during transplanting Hostas. They are –
- Preserving the Roots
Preserving the roots is essential if you want your Hostas to grow smoothly. To start, take a spade and dig six inches into the ground for the plant.
The plants can differ in size. One can be like a tiny miniature, while the other can be as good as a giant. It can range from two inches to six foot worth of sizes.
Even though they differ in sizes, the preservation process is still the same and important for the plant’s growth.
Another thing to keep in mind for good preservation is the thumb rule. That is, keep at least ⅓ part width apart from the plant’s width where it’ll be planted. This step is done to preserve the stems in the roots so that maximum results are acquired.
While doing the process, you should note that there might be some root damage to your Hostas. Removal processes usually cost damage to the root balls.
However, try to maintain the root’s structure at all costs as it can recover even if it’s damaged. Thus, be careful around the roots of the Hostas.
- Prepare a Place
Transplanting Hostas immediately to unprepared places can damage the plant. That’s because hosts aren’t immune to every type of environment. It’s better to prepare a place for your Hostas as their new home.
Considering the type of environment you choose, your Hostas can last from 2 days to up to 50 years. Hence, always prepare the place before you plant them.
The place you choose should be dry and not wet. Wet places can grow insects and cause health difficulties.
If it’s for home decor, try to keep the area clean and furnished besides the sunlight. And if it’s the garden, choose a place with moist soil that has organic enrichments around it.
- Consider a Cloudy Day
As mentioned earlier, weather plays the upper hand for Transplanting Hostas. Mostly it’s recommended if you transplant during spring or fall. However, another important day for planting Hostas would be a perfectly cloudy day!
Rainy days can make the soil moist and damp, which makes the perfect soil for your Hostas to be planted on. After a good rainy day, choose a cloudy day so you get the opportunity to plant your Hostas in damp soil. Doing so makes the digging process a lot easier too.
- Insert Spade
Take a good shovel and spade that suits your garden or the soil you’ll be planting on. Talking about a good spade is important if you don’t want to work too hard. With sloppy tools and too much sweat, Transplanting can get extremely tiresome.
After you’re done taking a spade, point it right onto the plant. Make sure you make a circle around the entire plant as it’s crucial to the process.
- Pry
This step is rather a crucial one. After making a circle, take your spade and keep it at such an angle that it faces the plant. With that angle, point your spade downwards and begin and pry it upwards.
While digging deep, you’ll find a bunch of root balls. Observe the root balls, and get the idea of the root ball’s size to preserve later.
The gist is to preserve as much rootstock as possible. You should do so. It’ll help you preserve the plant better and even help it adjust to its new place faster.
Check whether the root Baal is too heavy or not. If it’s too heavy, you might need some manpower to help you out.
- Lift the Plant
Next, go closer to the hole around the plant and lift up the Plant from deep within. Keep in mind to remove all the excess soil around the plant, so it becomes a lot easier for you to carry it.
- Divide into Manageable Pieces
You might find your plant to be quite large and mature. If that’s the case, divide your Hostas into manageable pieces through a spade.
By doing so, you can save the Hostas and transplant it later elsewhere or give out the extra pieces to friends and family.
- Insert into the Location
Now that you’ve successfully extracted the Hostas, take it and insert it into its new location. Keep in mind that the crown of the Hostas stays level with the soil surface. If it’s not aligned well, your Hostas can get damaged.
- Fill up with Soil
The hole you dug up earlier to remove the plant, fill it back with soil so you can work later on it. Keep in mind to ensure good soil, and there should be no air pockets left.
- Spread Mulch
To reduce weeds and maintain soil moisture, spread Mulch around the plant. The ratio should be somewhere between 2 to 3 inch layers. Remember that no matter what you do, the mulch shouldn’t touch the plant stems.
How to Reduce Shock When Transplanting Hostas
There are six ways in which you can prevent your Hostas from getting any shock. They are-
- Instead of watering the leaves of the Hostas, water the soil for at least 30 to 60 minutes before transplanting.
- Never transplant in direct sunlight
- Harden the plant into the soil.
- Try to keep the disturbed roots as small as possible. Damaged roots tend to spoil the other parts.
- Apply fertilizers for Hostas into the hope of transplantation where you’ll be planting them.
- Always water well after you’re done with transplantation.
Tips to Make Transplanting Easier for your Plant
There are some tips and tricks that can make your transplanting process much easier for you. If you keep them in mind, you’ll enjoy the process and achieve healthy Hostas. Some of them are –
- Water Thoroughly
Watering your plants is a crucial step for their sufficient growth. Try to choose a cloudy day right after a rainy day, as you’ll get the perfect moist soil texture. This texture is best for Hostas transplantation.
Don’t forget to water your Hostas daily after transplantation. The extra moisture helps in reducing the shocks of the Hostas.
- Compost
Always try to add a little compost to its new home before transplanting the plants. The compost helps in root development and keeps the soil healthy and moist.
- Mulch
Place a bit of mulch at the base of the plant when possible. Doing so will protect your host and retain its moisture. Try to top the soil with mulch when burying the plant along with the leveled crown surface.
FAQ
Can you use the same soil twice?
Yes, it’s possible to use the same soil twice. Potting soil can be reused instead of tossing it out. It’s recommended to use such soil at the end of the season.
Should you break up the root ball when planting?
When digging out the soil, remember to dig the holes eight inches deeper than the root ball so that it seems twice as wide. It’s also recommended to keep in mind that you use your hand or a knife to set the hole. Doing so lets the plant grow more than usual.
Can plants recover from transplant shock?
Trimming the plant will be key in recovering the plants from shock. Keep some patience and let your plants recover when you trim them. Take time and care of the plants to let them grow.
Conclusion
When it comes down to transplanting Hostas, it’s crucial to look after the plant and transplant it properly. Hostas can be tough, yet delicate plants to deal with. In certain conditions, they suffer from shocks that damage their plants.
Hence, we’ve covered all the ins and outs of how to reduce shock when transplanting Hostas. Now you can grow a plant more efficiently and prevent your Hostas from getting shocks too.