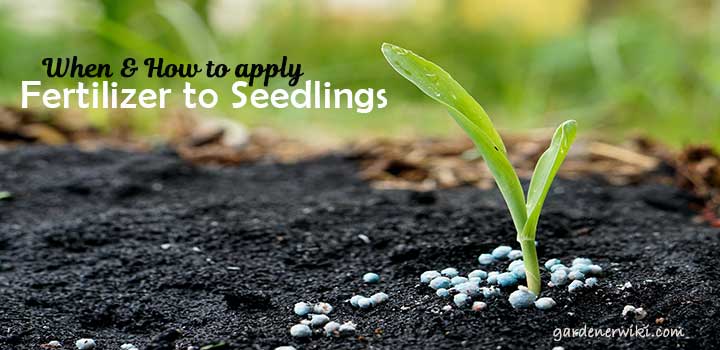
Among all of the topics, using fertilizer for seedlings is something many gardeners do not know. Even we thought that it was not necessary to fertilize the seedlings. But once we decided to apply on a seedbed as an experiment, we were shocked by the results.
However, one of our team members decided to carry out the same project; the results were not as shocking. Do you know why? Because he did not know how to apply fertilizer to seedlings. And we do not blame him because this topic is not that common topic among the gardeners.

However, we are here to break the chain. Through this easy-to-follow guide, we will ensure that everyone knows how.
When Should You Fertilize the Seedlings?
Before we describe how to apply fertilizer to the seedlings, we would like to ensure that you know when you should use it. Generally, the ideal period would be when the seedlings grow the first sets of true leaves. And there are differences between true leaves and first leaves.
In a nutshell, the first set of leaves that grow from the seedlings are from nutrients that are already packed inside the embryo. Gardeners refer to this as Cotyledons. And the true leaves that grow are from the nutrients that the seedlings collect from the soil.
On that note, to identify whether the first set of leaves is Cotylendons or true leaves or not, check the height. The closer it is to the ground, the higher the chances of it being a Cotyledon. Also, they will have a different shape than the actual leaves. They will tend to have an overall round shape.
When Should You Not Fertilize the Seedlings?
Knowing when you should not fertilize the seedlings is as vital as knowing when to fertilize them. Usually, it is recommended not to use any fertilizer when the plants are stressed. But how will you know if they are stressed or not? Well, these are the signs:
- When some of the leaves’ tips are dry, they will usually have a brownish color. This sign would mean that the leaves are burned by the harsh sunlight or light.
- Seedlings are falling to the ground. Here, it would indicate that they are infected by mold or mildew.
- They are tall and leggy, which dictates that they are not getting a sufficient amount of light.
- Leaves are a bit droopy. This scenario would indicate that they lack water/
Instead of applying fertilizer at this state, you need to address the problem and solve it. Once things go to normal, and the plants look normal, then start using the fertilizer.
How to Apply Fertilizer to Seedlings?
Now that you know when and when not to apply the fertilizer to the seedlings let us get to the point you are mainly here for. For the application of fertilizer, there are two different phases. In one of them, you would require a balanced fertilizer. This phase would involve you transferring the seedlings to individual pots.

On the second one, weekly application is a must. You should carry on the process of applying the fertilizer up until the seedlings are transferred to a garden. That being said, let us give you a brief explanation of both of the phases.
Phase One
When there are one or two sets of true leaves, it would be ideal for transferring them to individual pots. They will simply not grow at the correct rate if they are still on the bed. As you know, this process of transferring them to individual pots is called potting up. But do make sure that you use the right amount of potting mix.
While preparing the potting mix, follow these steps:
- Mix balanced organic types of fertilizers into the potting mixture. Use a separate container for mixing if you have to.
- While mixing the potting mixture, do not apply the suggested percentage. Instead, opt for a lower concentration. That will make sure that the amount is not too much for the plants to grow at a rapid pace, which is something that you do not want.
To illustrate, for a four-inch pot that has Zosia grass, you need about 1 tsp of 4-4-4 fertilizer for Hostas.
- Add about ½ tsp of rock dust into the potting mixture. This dust will ensure that there are vital micro-nutrients in the soil. The trace of the minerals will be high, which will eventually lead to lush and healthy seedlings.
This recipe and process have worked for all of the seedlings that we have worked with. And it will ensure that the growth is at the correct rate and encourage an extensive root system. The foundation will be healthy as well, and the plant will be highly productive.
Phase Two
After phase one, wait for about two weeks. In this interval, the plant should remain in the pot. Then, start feeding the plants with some organic liquid fertilizer. These solutions will have a higher amount of nitrogen value so mix the concentrate in one gallon of water.
Feed the diluted solution by following the bottom-feeding process. This method will prevent over-watering the plants. It will also ensure that the chances of fungus growth are minimal.
Once you bottom-feed the plants every week, you will notice that new leaves are growing. It will also increase the plant’s overall height, which will make them ready for transferring right into the garden.
On that note, the seedlings fertilizer that we usually use for phase two contains a mixture of 5-1-1. As you can see, the amount of nitrogen is high. And it requires diluting.
Final Words
After going through the entire article, we hope that one thing is sure to you that learning how to apply fertilizer to seedlings is pretty easy. And if you follow the phases correctly, you should end up with healthy and lush plants afterward.